
STARTING SEEDS INDOORS
Starting seeds has several benefits but learning how to start them indoors can be a little overwhelming, and a lot of things can go wrong. I tried and failed several times to start seeds indoors, but each disappointment taught me something new. Learning from my missteps and avoid making the same mistakes. The following method has proven to be very successful for me, and it’s very consistent and easy.
Why Use Seeds?
- Seeds are much less costly than bought transplants.
- There is a greater range of options when you are starting from seeds.
- When you grow from seed, you aren’t limited to planting what your local nursery or big box store has in stock.
- It’s thrilling to have something growing inside when it’s too cold to garden outside.
- Plants grown from seeds can be planted at the perfect planting time for your site. Planting at the right time is fundamental for success.
- You have the confident knowledge of knowing where the seeds came from, when and how they were grown, what type, if any, amendments they were given and the loving care they were also given.
Not All Seeds Need to be Started Indoors
Do note: Some types of vegetables, such as corn, beans and squash, are best started outdoors. There is little benefit to growing them indoors because they germinate and grow quickly. Seed packages will usually indicate the best method of planting the seeds. It’s great fun to watch new seedlings emerging from the planted seeds.
Eden Brothers also prides itself in finding high-quality, rare and hard to find flower seeds to bring your gardens the interest and intrigue of growing something your neighbors may not.
Each Seed Package has a Plethora of Great Information on Starting Seeds.
How deep to plant, seed spacing, plant spacing, days to germination, and germination temperature. There is excellent specific information about the plants the seeds will grow and much more..

Great information on the back of seed packages.
An Easy Way to Start Seeds
My favorite seed starter tray is 21 x 11 x 2”. It comes fitted with two 36-cell containers. This will allow you to plant 72 plants. Each cell in the container insert is 1.75” square. Each cell has a small hole in the bottom that allows water in and out. This gives you lots of plants without taking up too much room. There are many different seedling trays, however, this particular setup works well for me.
Seed Starter Trays Solve Several Problems
A garden’s worth of seedlings in one reusable tray. Fill the tray up with water. Put the included platform into the tray. Add the capillary mat (made of a spongy like substance) onto the platform. The mat is a little bit longer than the platform which allows the mat to go over one side into the water. Once the mat is in the water it will wick water across the entire mat and provide consistent moisture for each cell.
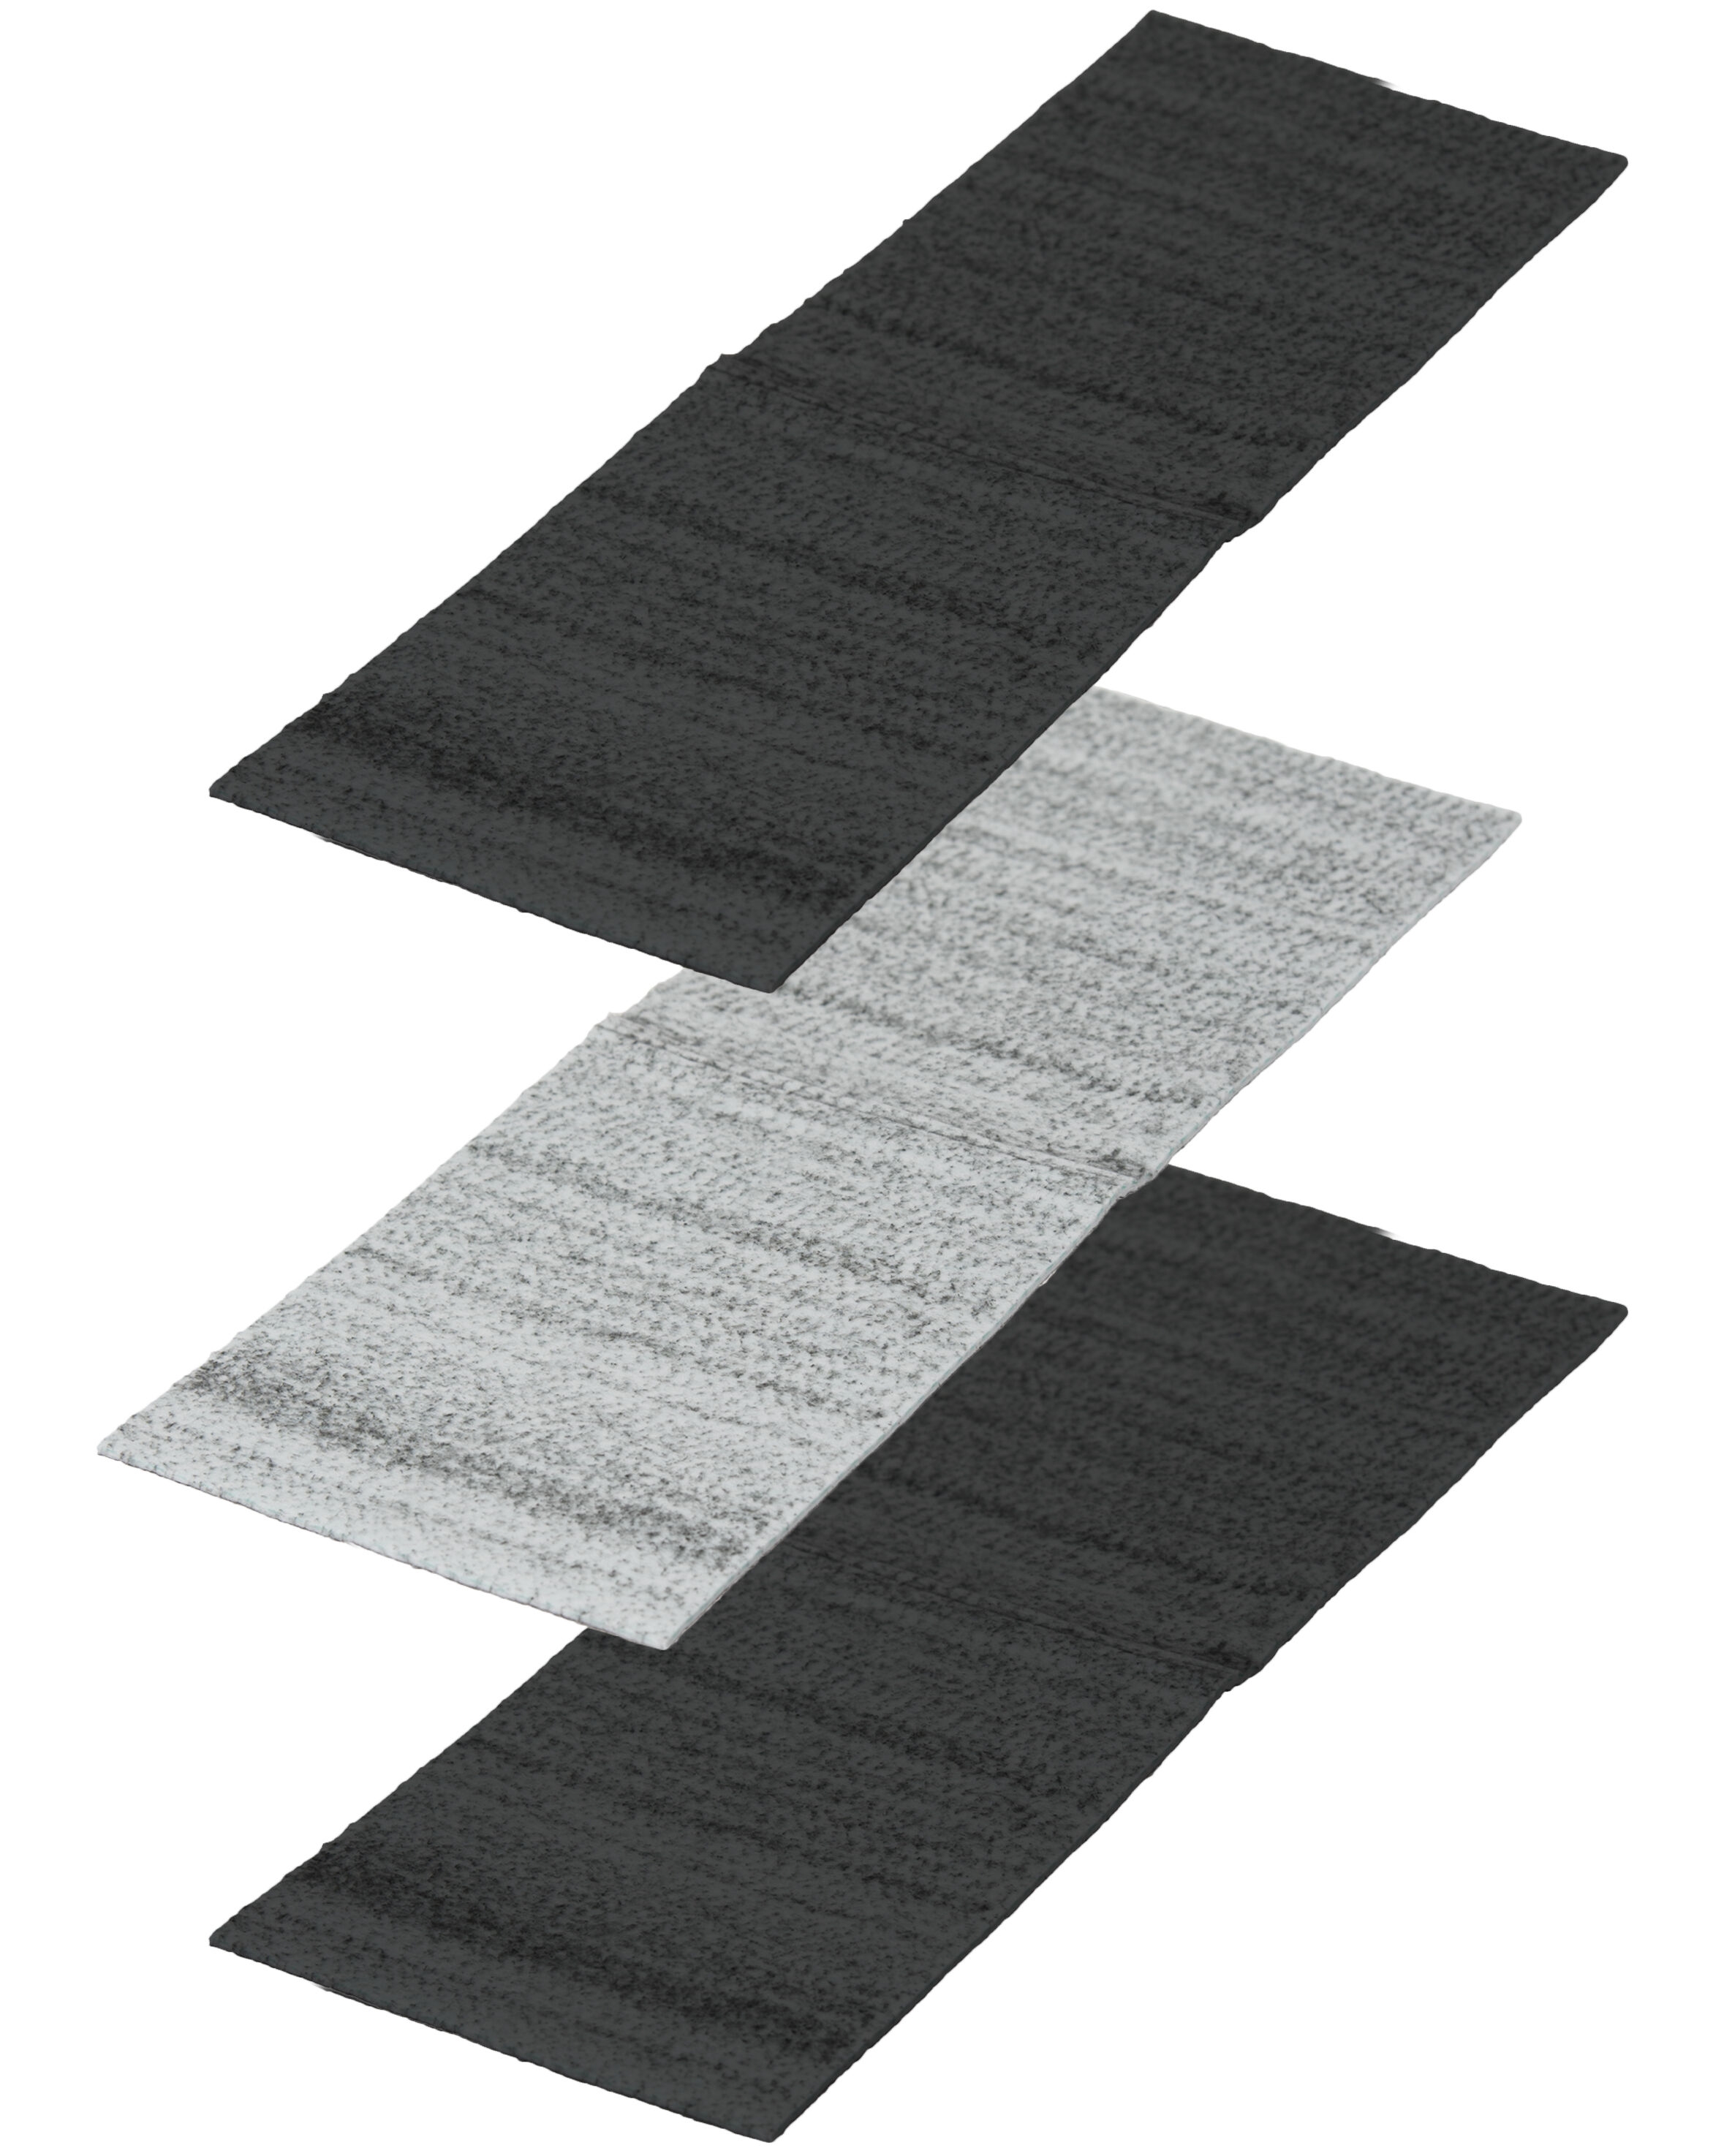
Capillary Mats to Wick Water from the Tray Bottom
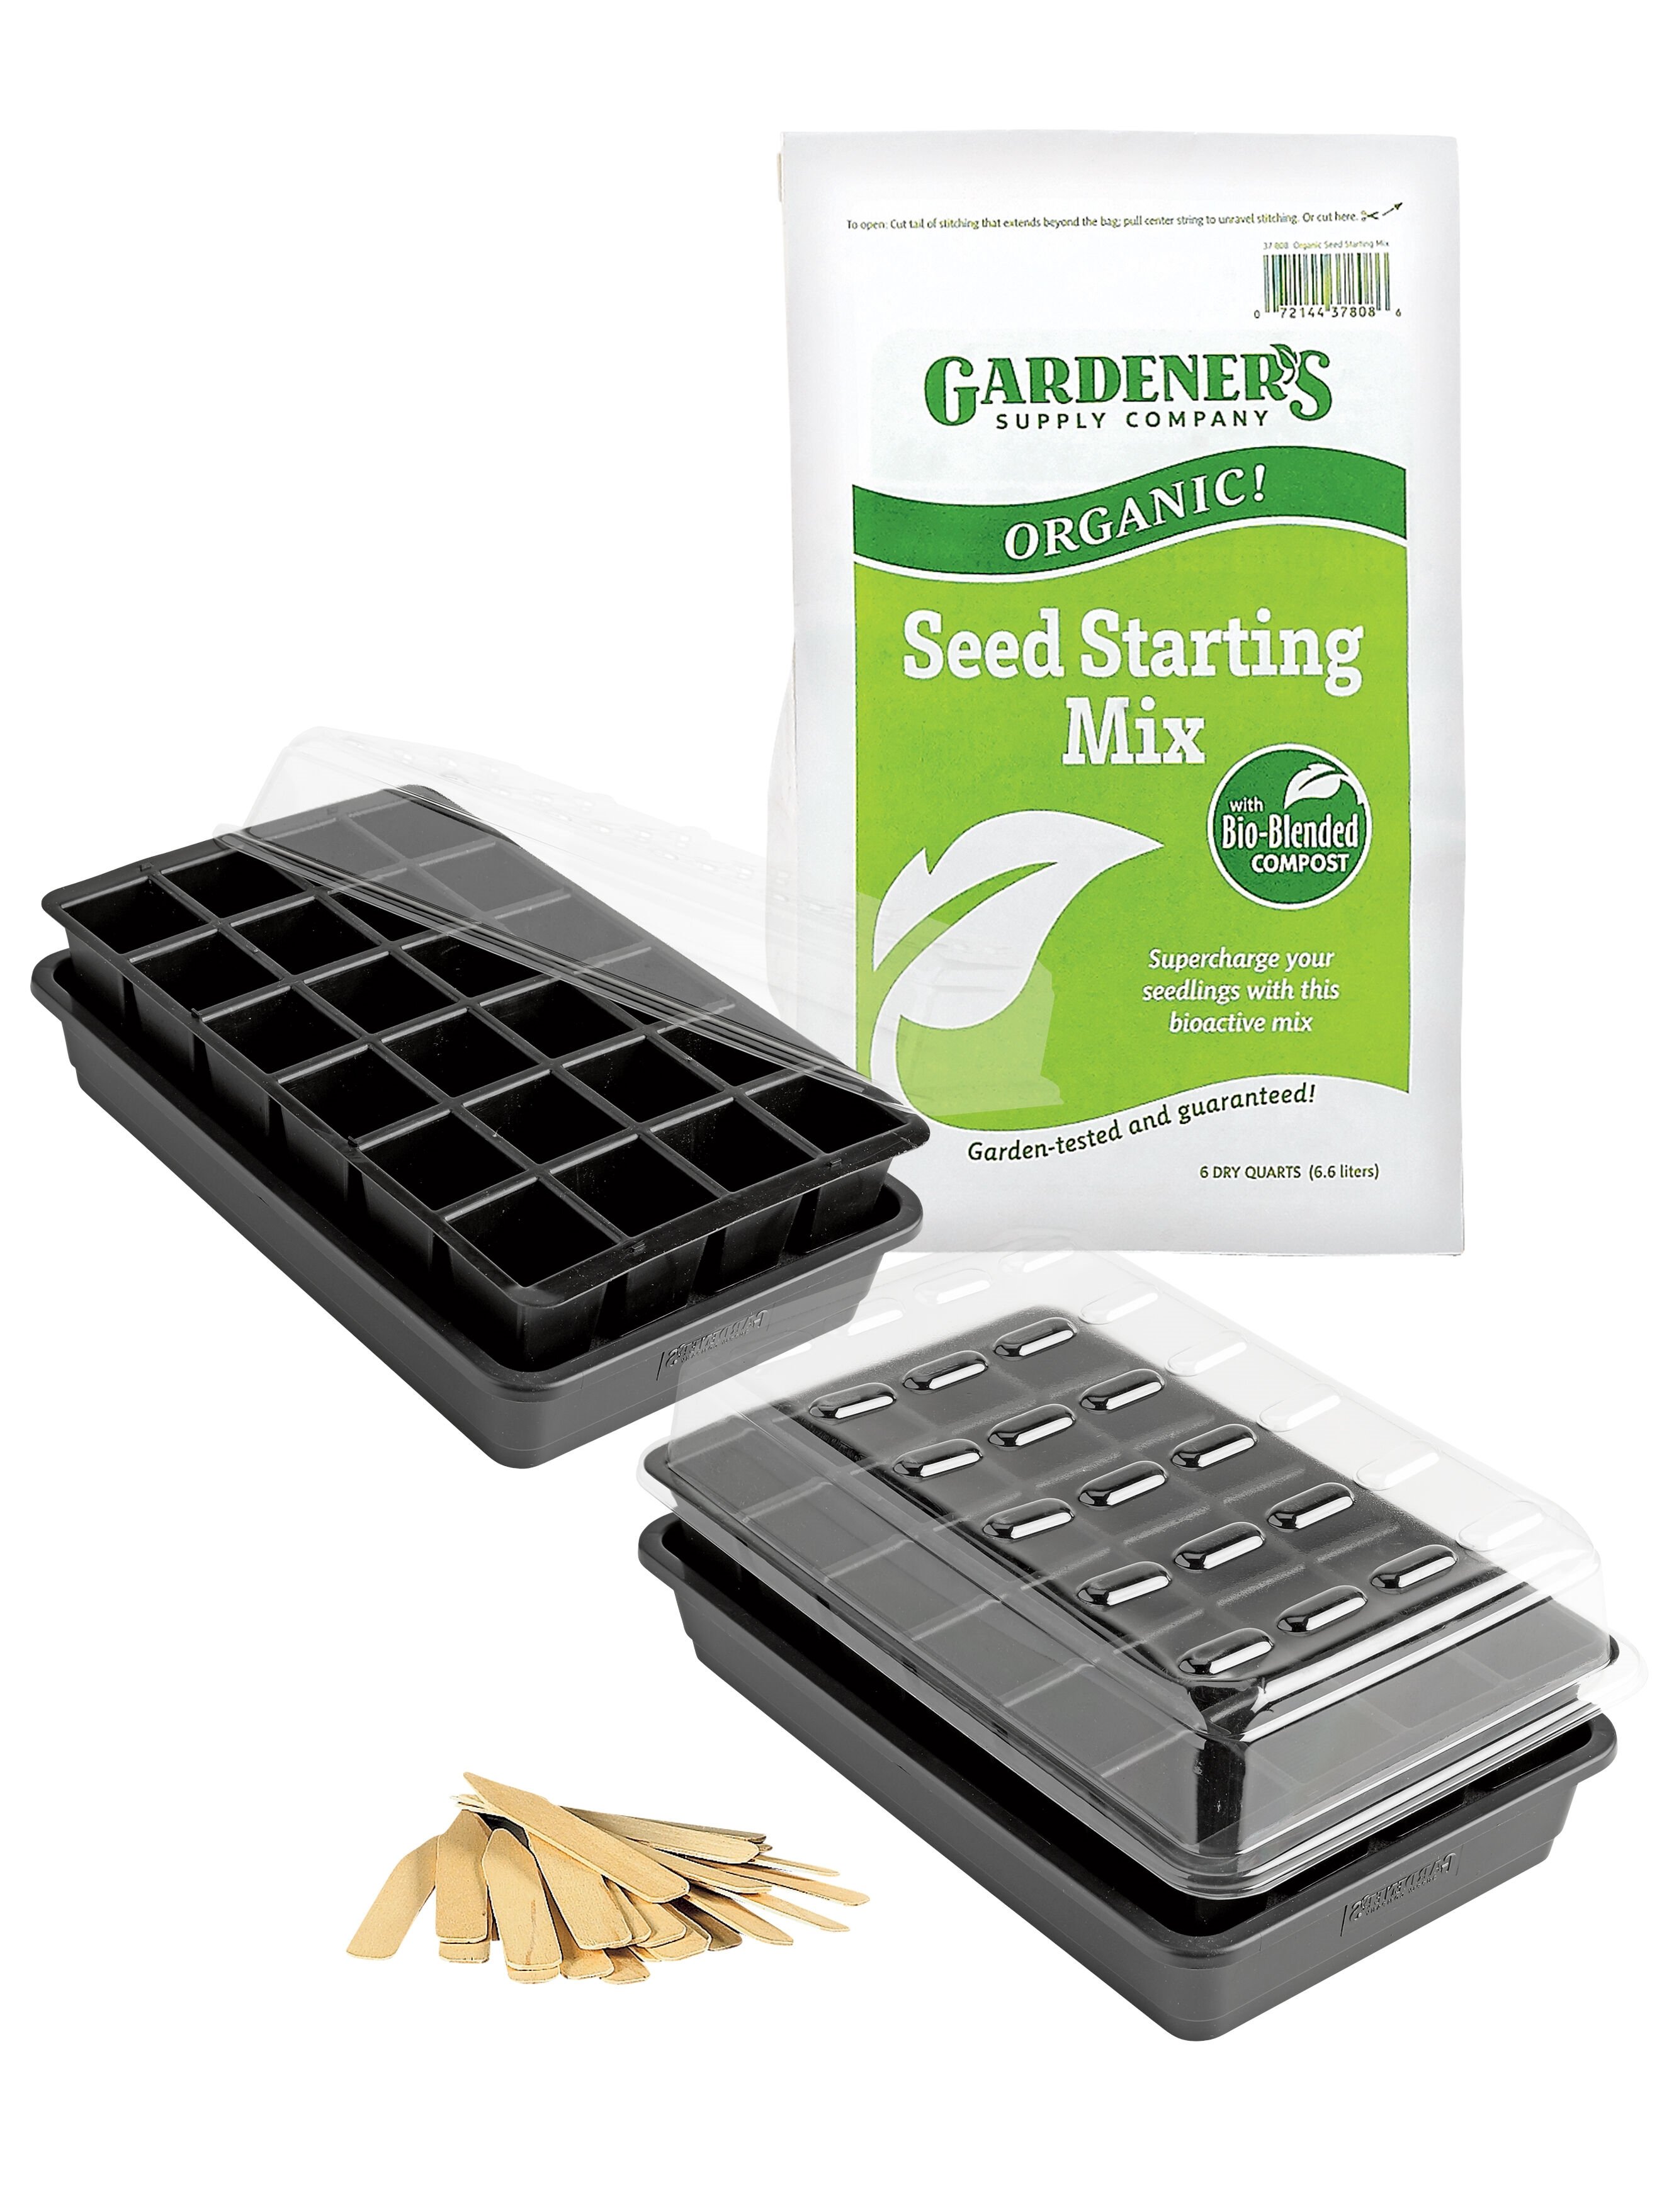
Seed Starting Kit
You’re not over watering or forgetting to water. The system pulls the water from the bottom and waters for you. Prevents most cases of damping-off disease. Be sure to use clean sterilized equipment.
The next thing we need is organic seed starting mix. Most basic seed starting mixes contain:
- Bio-Blended Compost (Composted manures and plant materials) for some nutrition.
- Sphagnum peat moss for water retention.
- Perlite for drainage and some water retention.
- Mineral and nutrient amendments for additional nutrition.
Great Seed Starting Mix
Some of the better seed starting mixes are formulated from:
- 80-90% sphagnum peat moss.
- Perlite.
- Limestone to adjust pH.
- Yucca extract.
- Earthworm castings.
- They include active ingredients of ectomycorrhizal fungi. (An ectomycorrhiza is a type of symbiotic relationship that occurs between a fungal symbiont, or mycobiont, and the roots of various plant species.)
You can achieve great results with just the basic seed starting mixes. The mix should be very finely grained with no hard chunks or sticks.
Start with a very large mixing bowl, tub or caldron. Something like you might serve a large amount of popped popcorn in. Pour the seed starter into the bowl. Then slowly add water from a watering can. You want the mix to be damp like a wet sponge squeezed out. Moistening the mix before adding to your trays makes the job much easier. This method is very sanitary and doesn’t make as big a mess. Fill the cells with the moist planting mix to near the top of each cell. Lightly tamp or tap the tray. This will help remove any air gaps.
Seed Markers for Starting Seeds Indoors
Before you start putting the seeds in, make markers of some type. Most gardening suppliers and seed companies offer a variety of seed markers for sale or you could make your own. I often use popsicle sticks bought from a craft store.
On each marker write the name of what the plant is and the variety if there is a variety and the date you are planting. Using tomatoes as an example, I would write on the marker: Tomato “Sweet Millions” 3/15.
Time to Add Seeds
I usually plant 6 seed cells of each variety. Again, using tomatoes as an example, I plan to put 4 tomato plants into each of my 4’ square gardens. The extra 2 tomato plants are my safety net. If I don’t need them, they are great gifts to family and friends.
Put 1 plant marker at the back of each row of 6. You could put a marker into each cell, but the tray will become very crowded. It’s important to know which plant is which. When the seedlings are small, they all look very much alike.
When the seeds are very small, I apply them as a pinch of seeds to each cell, these seeds may be put just on the top of the starting mix. With big plants like tomatoes, I like to plant at least 2 seeds per cell, and sometimes 3 if the seeds are known to be difficult to germinate.
Once all the seeds are planted into the starting mix, add a very light dusting of dry starting mix. This may help prevent a soil-borne fungus called “damping off” This fungus is difficult to eradicate once it is present in the soil, but you can avoid it by using a sterile, soilless grow medium, and by providing good air circulation. A small fan is very helpful for light air flow.
It’s also a great idea to add a description of where everything is in a garden notebook, just in case the markers get lost or moved.
Placement of the Lighting is Critical for Starting Seeds Indoors.
The light’s lamp needs to be as close as possible without burning the plants. Too close, the heat output of the lamp will harm the seedlings. But right above that point, you are getting maximum light output on the plant, without sacrificing the health of the plant.
Similar to plants growing outdoors in the sunlight, indoor plants grow best under full-spectrum bulbs, which produce a balance of cool and warm light that replicates the natural solar spectrum. They’re excellent for seedlings as well as houseplants, culinary herbs and other plants.
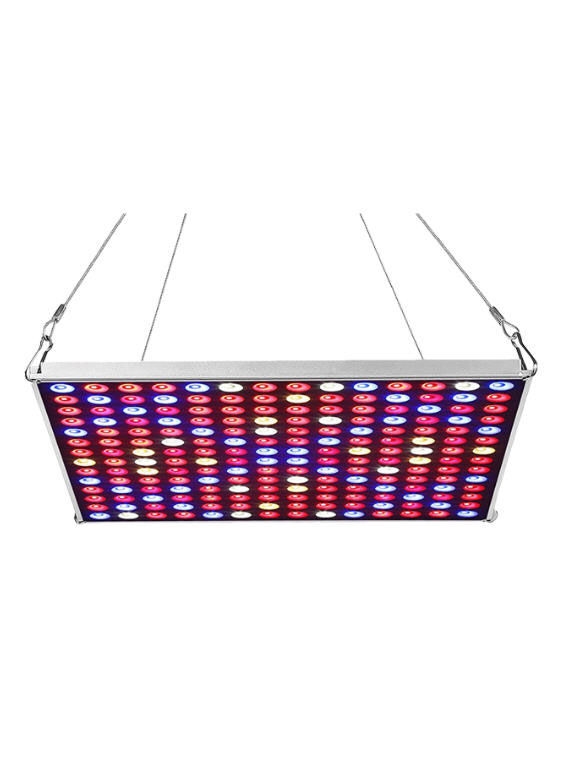
Full Spectrum Grow Light
It’s recommended to keep your lights on a 16/8-hour schedule. That’s 16 hours on and 8 hours off.
Germinate Those Seeds
Seeds need warm soil to germinate (sprout). They will germinate slower, or not at all, in soils that are too cool. 78°F is an excellent temperature for good germination. Waterproof plant heating mats, designed specifically for germinating seeds, keep soil at a constant temperature. Keep the soil/planting mix warm. After germination, air temperature should be slightly below 70°F. Seedlings can withstand air temperature as low as 50°F as long as soil temperature remains 65-70°F. Keep the growing temperature stable as possible. As soon as seedlings emerge, put your pots or cell clusters under the grow lights.
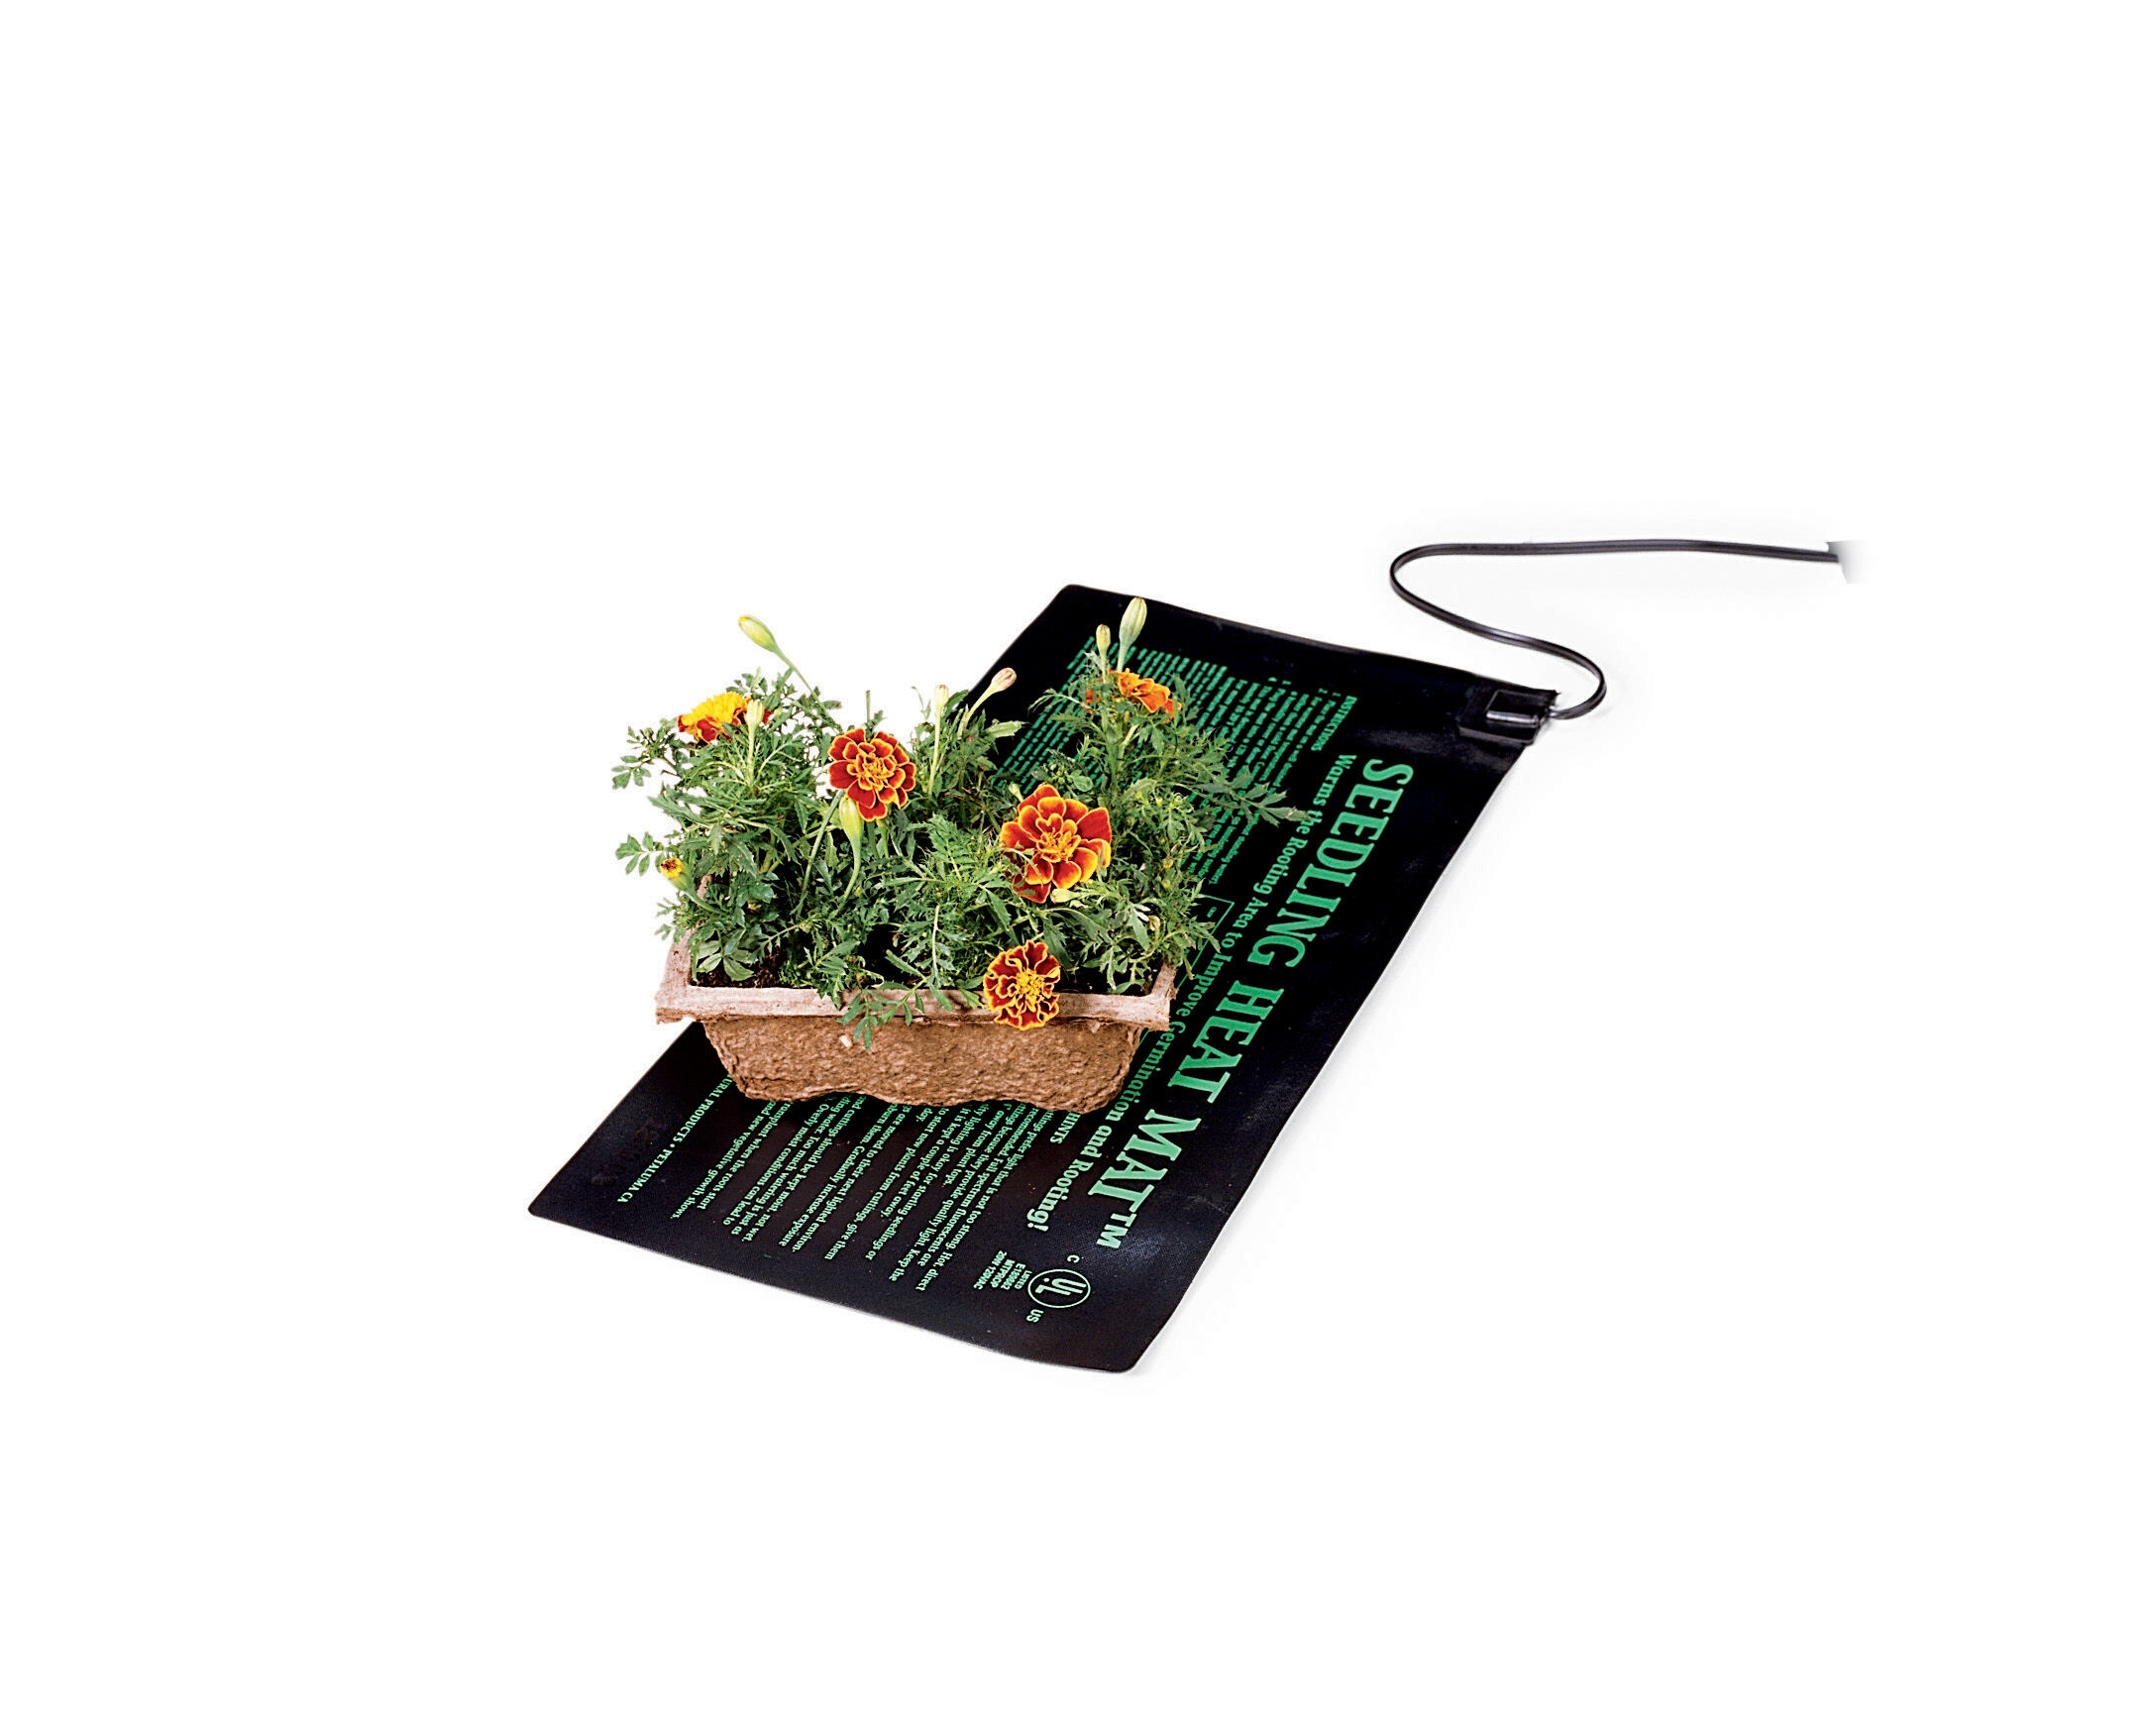
Heat Mat for Great Germination
Use a Diluted Balanced Organic Fertilizer
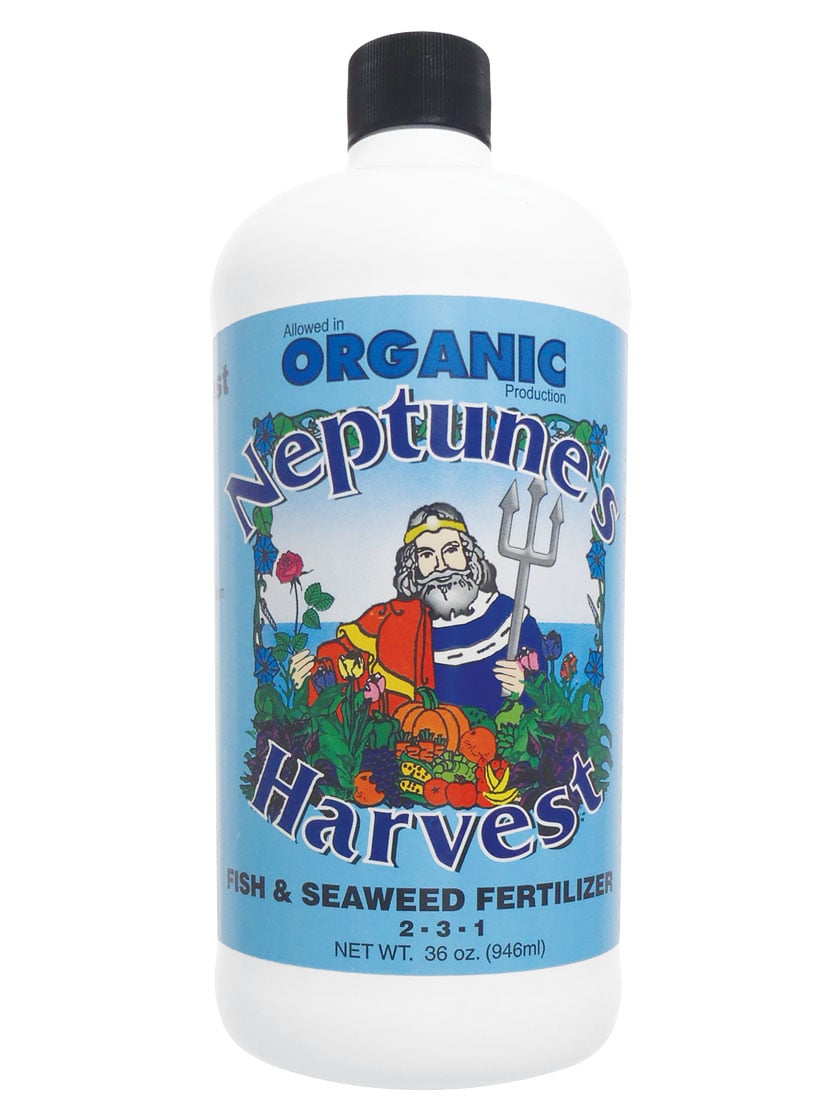
Provide fertilizer once the first true leaves emerge. The first set of leaves are known as ‘seed leaves’. The second set of leaves are known as ‘true leaves’ and a sign that your plant is getting mature and ready for serious growth. If the first set of true leaves turn yellow you maybe overwatering. Dilute a balanced organic fertilizer to ¼ the strength recommended on the label. Mix with the water you add to the containers.
Transplant Seedlings to Individual Containers.
As mentioned earlier, the seedlings will need to be transferred to a larger container. I usually use 3” peat pots. Delay this delicate process until the seedling looks sturdy enough to handle it. Transplant the largest, healthiest seedlings. Here’s how to make the move:
Fill the new container with moist, room temperature seed potting soil. Push a hole into it large enough for your seedling’s roots. Pick the most robust, strongest looking plant from each cell.
Gently tease away the starting mix around the seedlings root, using a popsicle stick or similar thin tool like a pencil. Lift the plant by the topmost leaves. Do not handle the stem. Lower the plant into the hole. Use a pencil to spread out the roots a little, but don’t worry if it’s not perfect. Sprinkle moist potting soil over the roots until the seedling is planted to the same depth as before. Press the soil down lightly.
If the seedling is a tomato, plant it deeper than before, so the stem can grow more roots.
Avoid changes in temperature and light levels for at least a few days while the plant is recovering from the transplanting.

Harden-off Seedlings Before Planting
Before your seedlings are moved from the grow lights to the planting bed, they need to be acclimated to outdoor growing conditions. The process is called hardening-off and advances the seedlings from protected indoor growing conditions to outdoor realities of wind, cold and stronger sunlight.
Hardening-off seedlings is a process that should be done slowly over the course of a week or two. Done properly, you’ll produce sturdy seedlings ready to withstand whatever nature throws at them. Rush the process, and you could burn, damage or even kill the young transplants.
A Little Tough Love for Strong Seedlings
Harden-off tender seedlings over a period of 14 days and then expose transplants gradually to outdoor conditions, each day increasing the time seedlings spend outside. Lower the temperature indoors slightly and gradually reduce watering over the course of hardening-off. You don’t want seedlings to wilt, just slowly stretch the period between watering.
Stop feeding 3-4 days before you start hardening-off. Don’t feed again until you transplant into the garden.
Start by placing seedlings outdoors in a sheltered spot – protected from wind and direct sun. Underneath an outcropping is perfect. Then bring seedlings back inside for the first two nights. Each day expose them to another 30-60 minutes of brighter sunlight. Work your way up to giving plants more and more direct morning sun, until they can handle mid-day sun without wilting.
Fully hardened-off seedlings should be able to withstand the same amount of sunlight they’ll receive when planted in the garden.
More Tips for Hardening-Off Seedlings
Check weather forecasts and keep tabs on predicted nighttime lows. If temperatures will dip below 40 degrees F, bring seedlings indoors. Unless it looks like there will be a frost or freezing temperatures, plan to leave seedlings outside overnight by the fifth or sixth night. Place them under an overhang or beneath a table for protection.
By the tenth night or so, seedlings shouldn’t need protection. Unless it looks like there will be a frost or freezing temperatures. After a week or two of hardening-off, your transplants should look stockier and tougher. When possible, transplant on an overcast morning with minimal wind. Wet the soil both in your plant’s pot and in the new hole.
Carefully transfer the root ball to the new hole. Spread out the roots as much as you can without breaking them. Add soil to the same planting depth as before. If the seedling is a tomato, plant it deeper than before so the stem can grow more roots.
Water well to bring the soil in contact with the roots. Continue to protect seedlings from high winds, frost, hail or heavy downpours. A plastic gallon jug with the bottom removed makes a good cover for seedlings.